Buzz / 06 12, 2019
IPHONEOGRAPHY 101: HOW TO TAKE PROFESSIONAL-GRADE PHOTOS FROM YOUR IPHONE
We are witnessing the steady decline of traditional point-and-shoot cameras as iPhones steer photography into a new, mobile age. The iPhone allows us to take great photos anywhere and everywhere, making photography easy and accessible to all. iPhones offer hundreds of opportunities to not only take, but also edit, enhance, and share photos with ease.
Apple has made the process of taking a photo simple: open your phone and press a button. Anyone can do it. However, there are ways to make your photos stand out and look more professional than ever before- and they only take seconds.
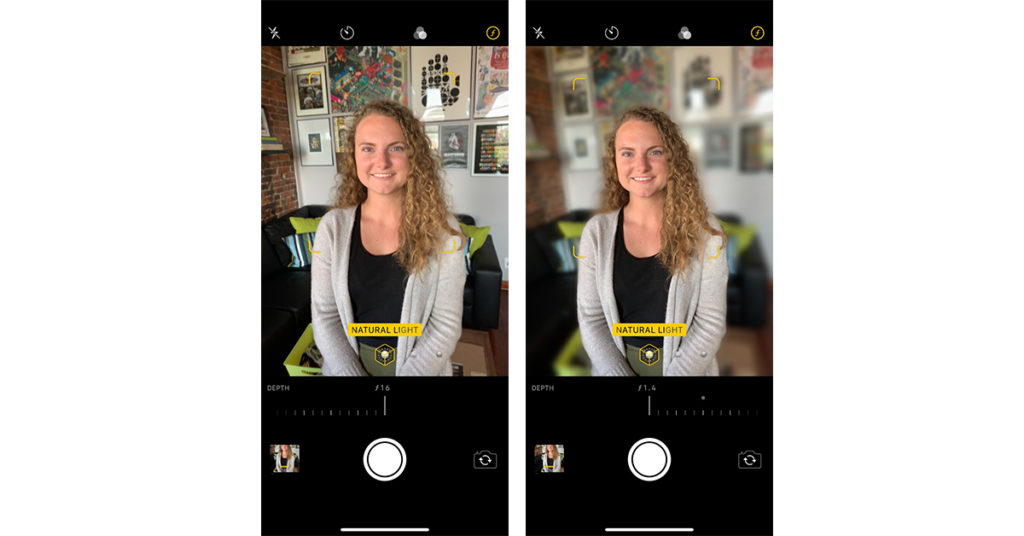
Recent updates to the iPhone camera feature tools that can enhance your photos before you even take them. The camera has several modes, including “portrait mode”, which blurs the background of your photo to give your images professional grade focus. There are multiple lighting options you can flip through within portrait mode, including contour light, studio light, and natural light, to see which works best with your environment. To make sure your photos are focused properly, your screen provides advice about whether you should back up or get closer to your subject. Once portrait mode is ready, the lighting icon even turns yellow to notify you. However, please note that portrait mode on the iPhone XR only works on people and needs to detect a face to properly focus. In order to make sure that the photos you take of your coffee or beautiful vacation views are clear, use the normal camera setting.
Portrait mode also offers the opportunity to adjust the aperture, or degree of focus, on the subject if you do not like the one that your iPhone automatically detects. To do so, go to the top right corner of your screen, where a little “f” is displayed with a number. Once you click it, a bar comes up that lets you adjust how much blur surrounds the subject of your photo- a lower number on the scale means more focus. You can leave the bar up while you take photos if you want to adjust the level of focus as you go.

If you have an XR but feel that you didn’t pick the perfect lighting effect or want to adjust how much blur is in your photo after you’ve taken it, you can do so in your camera roll. Simply open the image, select edit, and swipe through the lighting options or adjust the depth of field until you have the results you want. Other iPhones do not yet have this capability.
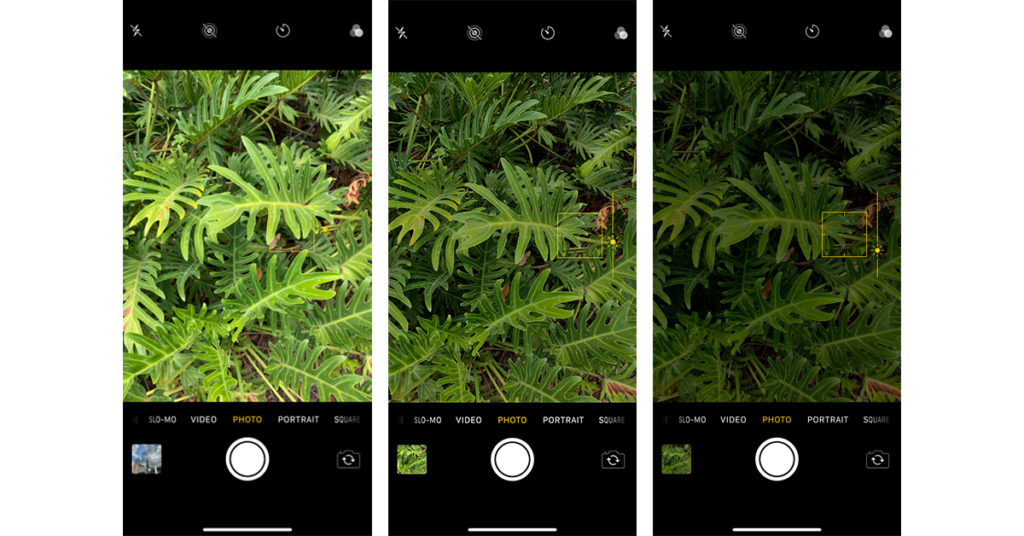
Another way to improve your photo is by adjusting the exposure on your photo. This works in both photo and portrait modes. Simply click on the screen, like you would usually do to focus an image, and then press and hold the little sun icon that comes up next to the yellow box and swipe up or down. Exposure can also be adjusted after you take your photo in the “edit” tab, where you will also find access to filters, cropping, and other tools.

The iPhone helped redefine the way in which we can capture the world around us. Making high-definition photography accessible was just the first step; digital trends have already started to take visuals to the next level. Photo is all about displaying your unique perspective and with these features, it becomes easy to do. Make sure to check out @hanekedesign on Instagram for more photos and inspiration from our team.
Not sure how to get started with your digital strategy? Feel free to reach out to Haneke Design. We are a firm that specializes in engaging users through the Internet of Things whether through a blog post or a mobile app!


